How I’ve configured what is probably the most advanced and flexible battery inverter/charger on the market.
To be useful, a household battery needs an inverter and a charger. A solar inverter may be able to perform both these functions, but only if the battery is the same voltage as the solar array. Mine is not, so I have a completely separate unit – an AC coupled inverter/charger.
The inverter/charger controls what’s going on with electricity into and out of the house. You can tell it how full the battery should be, when to import, export, store or use your power, be it from your solar array, wind turbine, the grid or a generator. It can also take instructions from external inputs, which is very useful in my case as it lets me connect it to my battery management system.
Sizing
My battery is 48 V 440 AH. It can discharge at up to 21 kW, and charge at up to 9.6 kW continuously. My solar inverter is a 7 kW SolarEdge. The size of the inverter/charger on a grid-connect system like mine is not critical, but it is critical for a standalone (off-grid) system. My system will only function as standalone if the grid fails, which is not often here. For a standalone system, you need to make sure that the inverter/charger (particularly the charger) can handle the full output of the solar inverter.
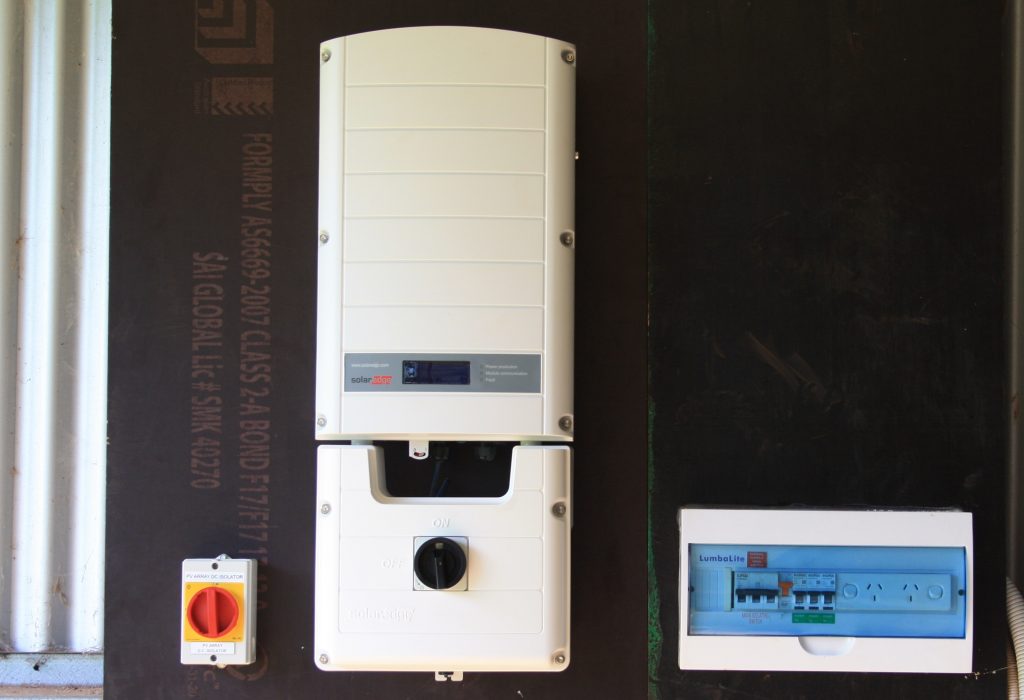
SolarEdge Solar Inverter 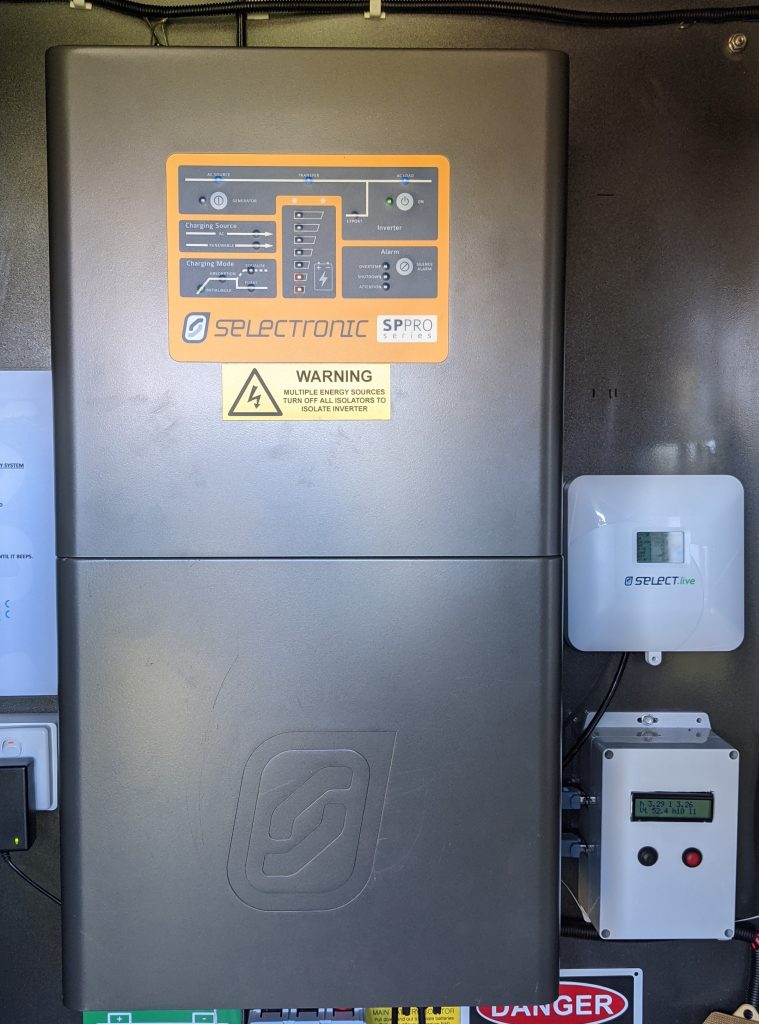
SP PRO Inverter/Charger
For my inverter/charger I selected a Selectronic SP PRO SPMC482-AU. This is a 7.5 kW inverter/charger suitable for a 48V battery. The 7.5 kW means that the SP PRO can handle all of the output from the SolarEdge inverter. The SP PRO can be configured to control certain solar inverters, to tell them to reduce output to match the load. But the SolarEdge is not on the list of compatible inverters, so the SP PRO will have limited control over that aspect.
Inputs
The SP PRO has four digital inputs. Each can be configured via software to do different things. I’ve connected all four to outputs from the Battery Management System (BMS):
- IN1 – Shutdown. If the BMS detects a severe fault the SP PRO will completely shut down.
- IN2 – Float. The BMS can tell the SP PRO to go into the charging mode called ‘float’. This is when the battery is full.
- IN3 – Absorb. The BMS can tell the SP PRO to go into the charging mode called ‘Absorb’. This is when the battery is nearly full, so the charging current needs to slow right down.
- IN4 – Priority 1. The BMS can tell the SP PRO to go into Solar Hybrid Control Priority 1. This is when the battery is empty, so the SP PRO should not discharge it any further.
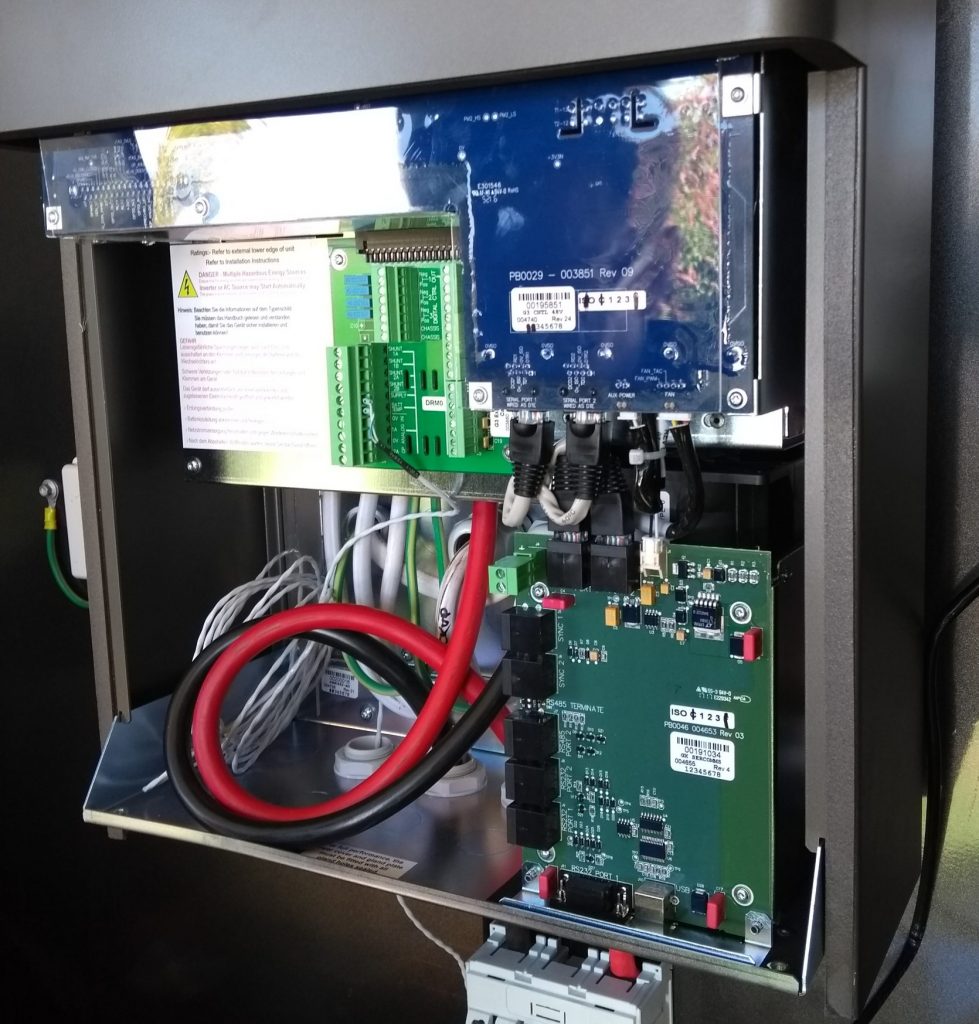
The SP PRO tracks the State of Charge
The SP PRO monitors the current flowing through the cables from the battery. It can tell which way it is flowing, and can add it up over time. I’ve told it the capacity of the battery, so it can use this information to calculate how ‘full’ the battery is at any time. The State of Charge (SoC) of the battery is given as a percentage of full, so 0% is empty and 50% is half full. The SoC on the SP PRO is fallible, it can get out of whack when the battery is disconnected or on certain faults. So it’s important to take this figure with a grain of salt, and it’s important to reset it periodically. I’ve configured an equilisation charge every Sunday, where the SoC is reset to 100% by fully charging the battery.
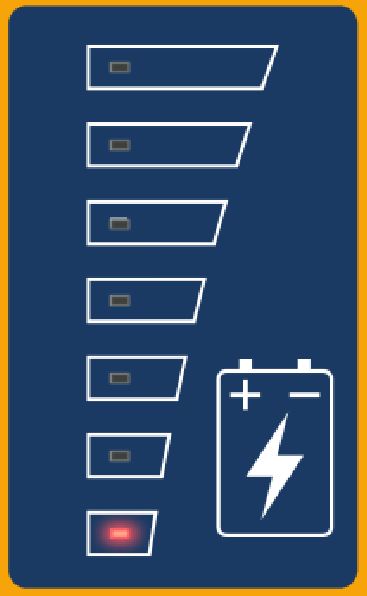
SP LINK Software
SP LINK is the Selectronic software that allows you to configure the SP PRO. You connect your computer through a USB or RS-232 port on the inverter, or you can connect via the internet if you have the Select.live accessory for your inverter. It will only run in Windows, which is a bit annoying for me, I think this is the only program I have that will not run on Linux.
I find SP LINK to be stable and reasonably straightforward to use. There are hundreds of settings to manage and they’ve done a decent job of laying them out in a logical order. That said, it took me a while to get my head around it, and there are still some things that I don’t have a good grip on. I make extensive use of the quite good help system.
The SP PRO controls how to charge the battery
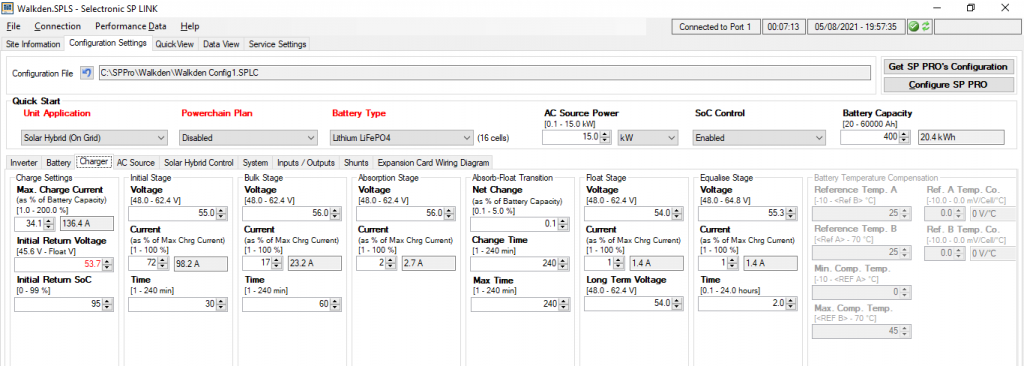
The charging function of the inverter/charger needs to be customised for my home-made battery. The SP PRO uses four different stages of charging, and this is how I’ve set them up. Setup is via the SP LINK software, and I’ve used terms from that software in my descriptions below. I’ve written SP Link terms with initial capitals, such as Initial Return Voltage.
I also refer to my home made Battery Management System (BMS), the Low Cost BMS. I’ll provide more detail on this in another post.
Initial Stage
This mode charges at a fast rate, with the idea that the battery is at low SoC, ready to accept fast charging. The charger goes into Initial stage when it sees the voltage reach the Initial Return Voltage for more than two minutes, or if the state of charge drops to the Initial Return SoC value.
The charger charges at up to 72% current, which is quite high. It will eventually reach the target voltage of 55 V, and will then reduce current to keep the battery at that voltage. If the voltage is maintained for 30 minutes the charger goes into bulk mode.
If the SoC was high when Initial stage was entered, the BMS may push the charger into Absorb mode (if more than half of the cells start to balance).
Bulk Stage
We get to Bulk mode from initial stage, when the battery is somewhat charged. Bulk stage charges at a slower rate, to stop the cells going over voltage, but still quite high to enable a decent charging rate.
The charger charges at 17%. When 56 V is reached, the charger slows down the current to keep the voltage steady.
The BMS will turn on cell balancing when a cell voltage reaches 3.45 V. If the maximum cell voltage gets to 3.62 V the BMS tells the charger to go into Float stage. If half the cells are balancing the BMS will tell the charger to go into Absorb stage.
The charger will move into Absorb stage if the target voltage is achieved for 240 minutes. This is not likely, the BMS normally takes us out of Bulk.
Absorb Stage (IN3 on SP PRO, OUT5 on BMS)
We are in Absorb stage because the BMS saw half the cells balancing (from Initial or Bulk stage), or the charger saw the Bulk voltage target reached for a set time. This is where we deliberately slow down the charging current to allow all cells to balance.
Charger maximum current is limited to 2%. Voltage target is 56 V (same as Bulk). Each cell should start to balance in turn. Once all enter balancing mode, the battery is full and the BMS tells the charger to go into Float stage. The BMS will also trigger Float if one cell goes over 3.62 V, or the charger will trigger Float if the charge rate is low for a long time.
Because the Float charge current is so low, if the SoC is not high enough the pack voltage may reduce even as it is being charged. If it reduces to the Initial Return Voltage (53.7 V), the system goes back into Initial stage. Initial stage will push more current into the pack, so the SoC will be higher next time we go into Absorb.
Float Stage (IN2 on SP PRO, OUT1 on BMS)
We’re in Float stage because either all cells were balancing (triggered by BMS), or because we were in Absorb for a long time (triggered by SP PRO). The battery is full.
Voltage target is 54 V, which is lower than the absorb voltage. This is so that the battery doesn’t sit at a high voltage for a long time. The inverter will discharge the battery (either into household loads or into the grid) to get down to this target. Float stage can supply a small load, but we’ll go to initial mode if the voltage goes down to the Initial Return Voltage, or if the state of charge drops to the Initial Return SoC value.
The SP PRO controls when to charge the battery
Most days the SP PRO is set to charge the battery only when the available power exceeds the household usage. Every Sunday though, I’ve set it up to do a full charge whether there is sun available or not. There are two reasons to fill the battery on a weekly basis. The first reason is as stated previously, that the SoC reading for the SP PRO should be reset periodically. Taking the battery to 100% is a good way to reset. The other reason is that the BMS can only balance the cells when at a high state of charge. Regular balancing is important to maintain system capacity.
The SP PRO controls when to supply power from the battery
Our house is connected to an electricity tariff that includes peak and off-peak pricing. The battery can’t store enough energy to run our house for a typical day, so we still need to buy electricity from the grid. If I’m going to import from the grid, I’d like to limit my import to the cheaper off-peak times. So I’ve configured the SP PRO to prioritise electricity from the battery during the peak times. The logic goes:
If the household usage is higher than the solar production, use the battery.
If it is an off-peak time, don’t take the battery below 25% state of charge.
If it is a peak time, you can discharge the battery down to 2%.
Peak times are 7:00-10:00 and 16:00-21:00 Monday to Friday. All other times are off-peak including all day Saturday and Sunday. This is quite complicated to set up! You can do this with the ‘Solar Hybrid Control Priorities’ in the SP Link software. I’ll attempt to explain each of them here.
Explanation of Solar Hybrid Control priorities:
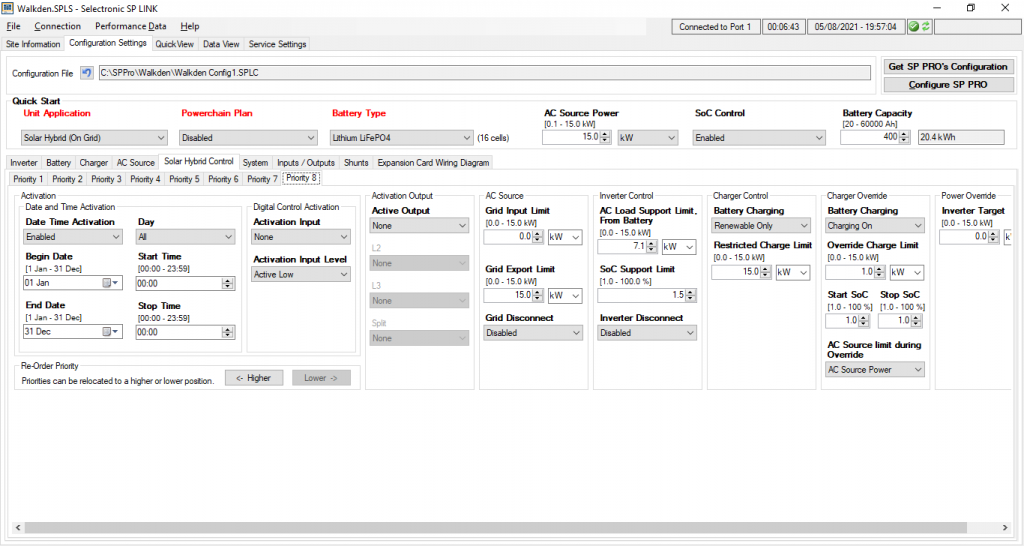
Priority 8 – Peak Time
This is the default priority when nothing else with a higher priority is happening. The date and time activation section selects for all dates and times.
Inverter Control → AC Load Support Limit From Battery – set this to not exceed your cells’ discharge rate.
Inverter Control → SoC Support Limit – set this to limit how low your battery should be discharged, as measured by the SP PRO. Set it low (e.g. 2%) to get the most out of your battery during peak times.
Charger Control → Battery Charging – set to Renewable Only to charge from solar.
Priority 7, 6
Not used
Priority 5 – Off Peak 10:00 – 16:00
Date and time are set for this off peak time (Monday to Friday), so this is active during these times. Otherwise similar to Priority 8, so most settings are the same.
Inverter Control → SoC Support Limit – You might like to set this to 25% in the winter.
Priority 4 – Off Peak 21:00 – 07:00
Date and time are set for this off peak time (Monday to Friday), so this is active during these times. Otherwise similar to Priority 8, so most settings are the same.
Inverter Control → SoC Support Limit – You might like to set this to 25% in the winter.
Priority 3 – Off Peak Weekends
Date and time are set for this off peak time, so this is active during these times. Otherwise similar to Priority 8, so most settings are the same.
Inverter Control → SoC Support Limit – You might like to set this to 25% in the winter.
Priority 2– Sunday Balance Charging 8:00 – 23:00
This is the weekly balance charging. The battery is charged from the grid during this time, no discharging will happen.
Inverter Control → AC Load Support Limit From Battery – set to 0 so that battery is not discharged.
Charger Control → Battery Charging – set to Charging On to charge from the grid (and solar if available).
Priority 1– Low Cell Voltage as triggered by the BMS
This priority is triggered by the BMS via an input. It is telling the SP PRO that the battery should not be discharged any further. The battery is slowly charged, and the BMS will remove the trigger once the cell voltage raises higher than a threshold.
Digital Control Activation → Activation Input → Digital Control Input 4.
Inverter Control → AC Load Support Limit From Battery – set to 0 so that battery is not discharged.
Charger Control → Battery Charging – set to Charging On to charge from the grid (and solar if available).
Charger Control → Restricted Charge Limit – set to a low value (0.2 kW) so that the battery is slowly charged to get voltages back to normal.
How does the SP PRO know when to stop discharging the battery?
There are several ways that the SP PRO is configured to stop discharging:
- If the state of charge gets down to one of the configured points above (25% or 2%, depending on the time of day).
- If the BMS tells the SP PRO to stop discharging via an input.
- If the total battery voltage gets down to a certain voltage.
- If the BMS chucks a hissy fit and disconnects the battery via a contactor.
Somewhat annoyingly, if the grid power is interrupted the SP PRO goes into a mode where it ignores #1 and #2. The idea is that if the electricity goes off it should power the household loads no matter what. I’ve recently installed an indicator light in the lounge room that comes on if the grid power goes off. Without this indicator we didn’t know that the power had gone off, and the battery discharges quite quickly if we have a few heavy loads. Now we have an indication that we should turn off (for instance) the car chargers and the heat pump, to make the battery last longer in an extended power outage.
Other Features
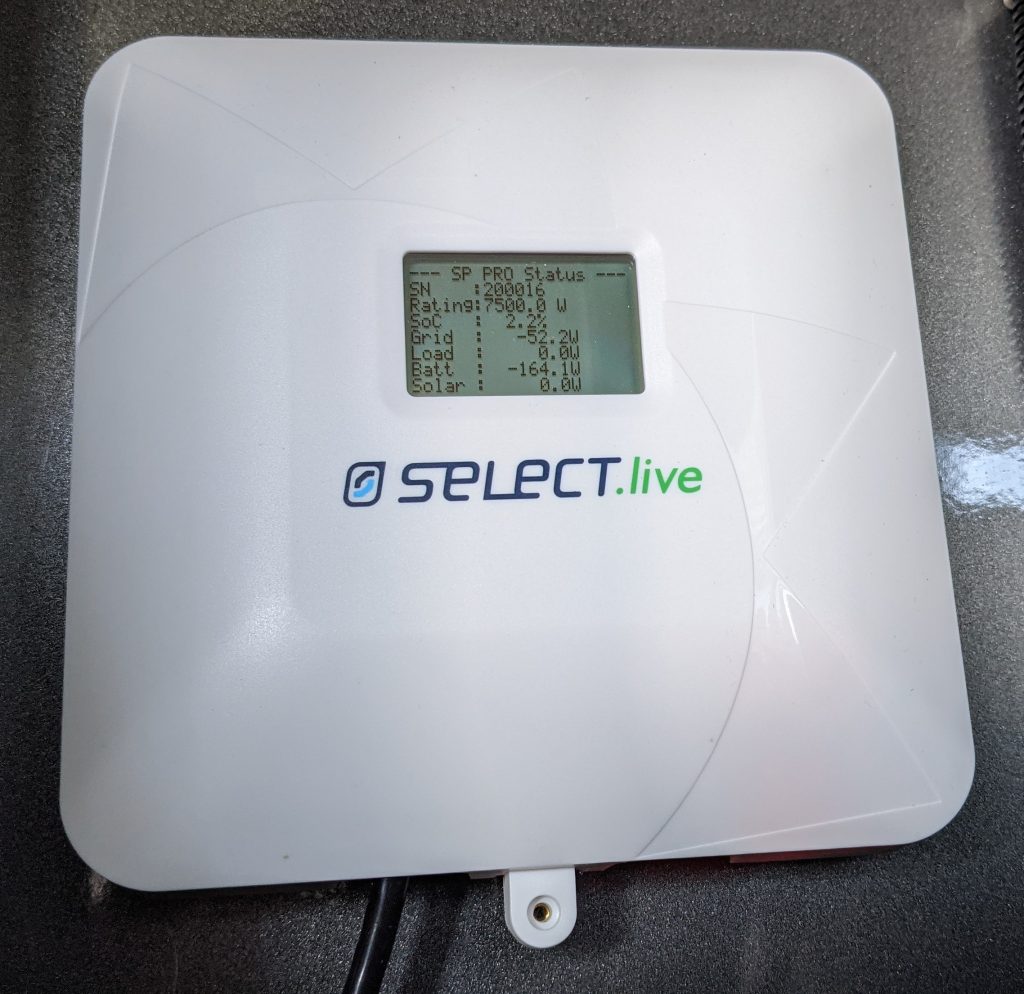
I purchased the optional Select.live accessory, a white box that connects to one of the RS-232 ports. This connects the SP PRO to the internet via my wifi, which means that I can monitor my system parameters and performance from a phone or computer. It doesn’t matter if the wifi drops out, the system works fine (including logging system events and faults) off-line.
The SP PRO can email you for certain events. This doesn’t seem to be configurable, and I’m not sure exactly which events qualify. But I get an email every time that the main pack voltage goes below setpoint, and again when the voltage returns to within tolerance.
By default the SP PRO has an audible alarm, but this can be muted at certain times so it doesn’t wake you up. I have it muted all the time, since it sounds when the aforementioned low voltage condition occurs, and I don’t really care about that.
The folk at Selectronic are knowledgeable and responsive. I asked several questions through my electrician, and they were each answered promptly and comprehensively. I’m not sure if they would engage with me as an end-user, I haven’t tried that and I would understand if they did not.
In Conclusion
The SP PRO is an amazingly configurable and flexible inverter/charger. It is a great choice for a home made battery, since you can control so much of the way that it charges and discharges. It is also able to cope with a complex electricity tariff like ours, with two peak and off-peak times every weekday. Apparently the Tesla Powerwall (for example) cannot cope with our time of use tariff, and installers have to make do with a cut-down version where they only enter one of the off-peak times.
All in all I am happy with the unit, and I don’t know if there is anything else out there that would have done what I needed.
If you intend to use the SP PRO, you might like my configuration as a place to start. Here are my SPLC files for use with the SP LINK software.
Winter Configuration – will discharge down to 25% during off-peak times, 2% during peak times. I use this because in the winter my usage far exceeds my generation capacity, so I want to reserve some for peak times.
Spring, Summer & Autumn Configuration – discharges to 2% at all times of the day. This is for when my generation typically exceeds my usage.
Float absorbtion and equalisation have no place whatever in the charging of Lithium cells. Any charger that purports to charge Lithium and in the same breath mentions these terms is bullshit to sell you something that will damage your cells.
They put excessive voltage on the cell and wait for the cell to quickly come up to 3.5 volts before they then reduce the voltage to 3.65 and allow the current to drop which it does immediately.
Go to researchgate and search for white papers on exceeding the charge voltage on Lithium to see the results.
You’re correct, a true float (or equalise) is not applicable to a lithium battery. That is not what is happening in this case though, the ‘Float’ stage is just a label that the SP PRO uses for the final charging stage.
I’ve re-purposed the Float stage to do something suitable for a lithium battery. The Float stage is the final charging stage, it occurs after the battery has been fully charged. Fully charged is 56 V (3.5 V per cell), but then we go into Float stage at 54 V (3.4 V per cell). So in this case ‘Float’ is actually resting the cells at a lower voltage, not ‘floating’ them as the name implies.
Good point on the use of the word ‘equalisation’. I’ve removed the word from the post, as is a loaded term that makes learned folk think I’m talking about lead-acid equalisation. Really I just meant that I was charging the battery to 100%.
cheers for the great article. I have never used a Selectronic but plan too. I will have an AC coupled system with the selectronic only comming on at peak times 5-8 pm to run the selected few loads. How would i have the Selectronic only charge the batteries the next day once the sun is shining ? Will this need a CT on the mains wired back to the selectronic? Where would this be connected in the inverter and what configuration would be needed to make this happen ?
Cheers Franco
This is a standard configuration, very similar to mine. I’m not sure about CTs, as it was installed by an electrician, but I think they are all internal to the unit. It gives me monitoring of the solar generation (AC) as well as the AC load. Also the DC current going into or out of the battery.
You use the “Solar Hybrid Control Priority” section of the SP Link software to configure the way the SP Pro charges and discharges your battery. Look at the screenshot above describing Priority 8. The Battery Charging section is set to “Renewable Only”, so it will only charge when there is solar available. There are 8 priorities, you configure them so that you have different settings at different times of the day or week. This is difficult to figure out! It took me quite a bit of time and experimentation to understand how the different priorities interact with each other.
Hi Christopher
Great blog. What level of control over the SolarEdge did you achieve. eg. if the grid goes down and the batteries are full can the Selectronic frequency shift to tell the SolarEdge to stop producing?
Thanks Joe.
Yes, the SP Pro will tell the SolarEdge to stop producing via frequency shifting in that situation. This means that as soon as the battery can’t absorb all the energy from the solar panels, the SolarEdge is turned off. This isn’t a good solution long term, but it’s fine for the odd off-grid situation.
If you have a Fronius or ABB solar inverter, the SP Pro has a lot more control. It can control the flow of energy from the solar panels, meaning that the battery can be topped up completely, even if off-grid.
I am living in South Africa and have therefore no support for my kaco eco which is actually a SP Pro 481 series 1. Managed to install the unit 2 years ago and I am also AC coupling to a unsupported Solar inverter and it’s working extremely well. I want to replace my lead acid batteries with lithium but the supported lithium batteries are not available in South Africa.
Please advise if I connect for example a 4.8kw Pylontech lithium battery, use your setting but make sure voltages is according to Pylontech spec but leave out the BMS cable and connection, will it work and what will be the risk?
Thanks for all your info on this block. Are there perhaps any forums in Australia dealing with Selectronic to which can help
I assume that you’ve tried the Selectronic support people? support@selectronic.com.au
My guess is that the Pylontech would need bi-directional communication to operate. I reckon if you leave out the BMS then it will decide to disconnect. But I don’t know…
The risk of running a lithium battery without a BMS is that it might catch fire and burn. Lithium battery fires can be extremely exciting, so I would not recommend this.
Sorry, I’m not aware of any forums, I’ve received all my information from Selectronic itself.